Skip to content
THE 10% DISCOUNT CONTINUES UNTIL OCTOBER 20. ENTER THE CODE "DOPOFIERA10" AT CHECKOUT
Free shipping on orders over €89

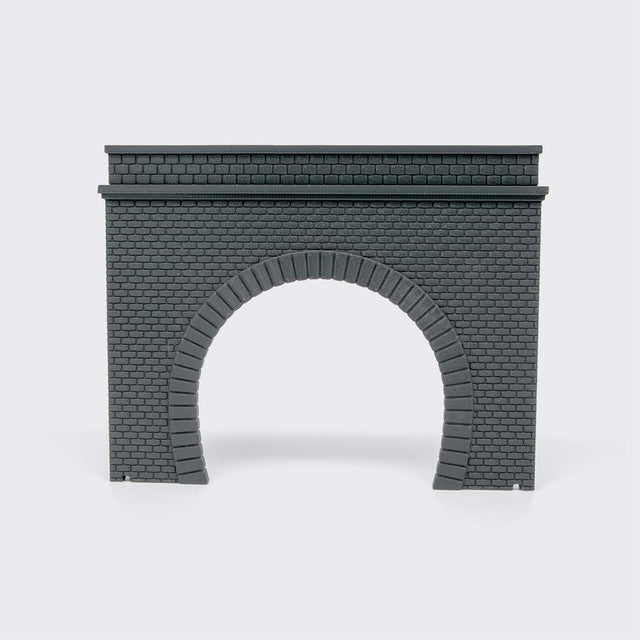
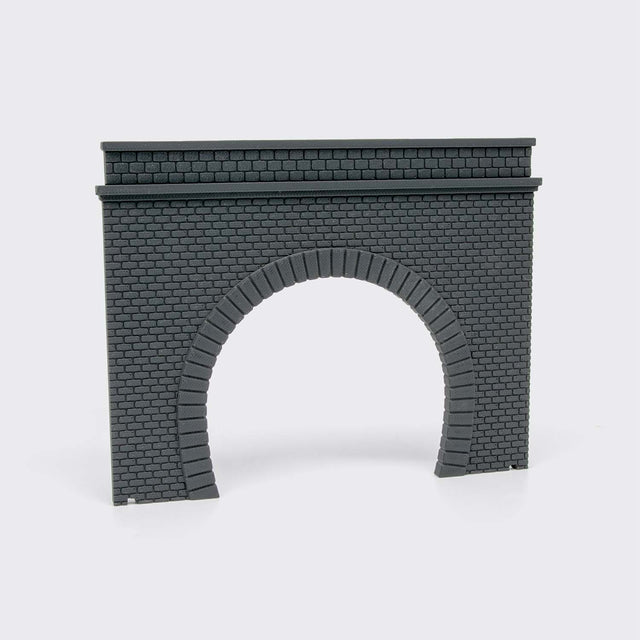
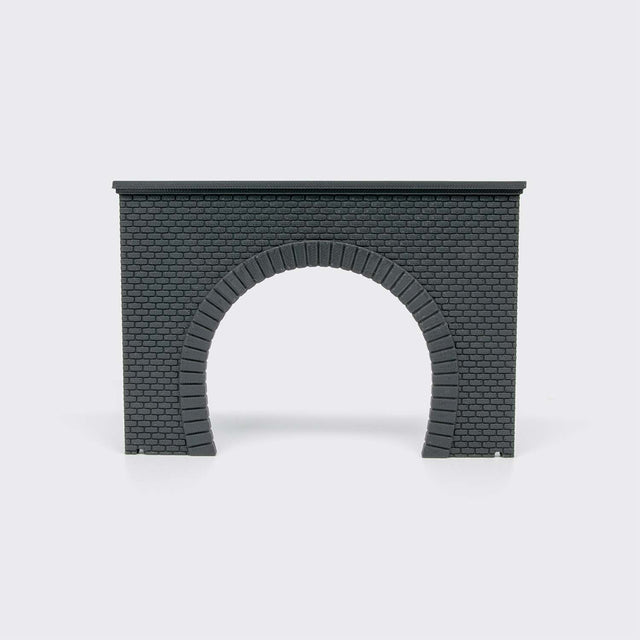
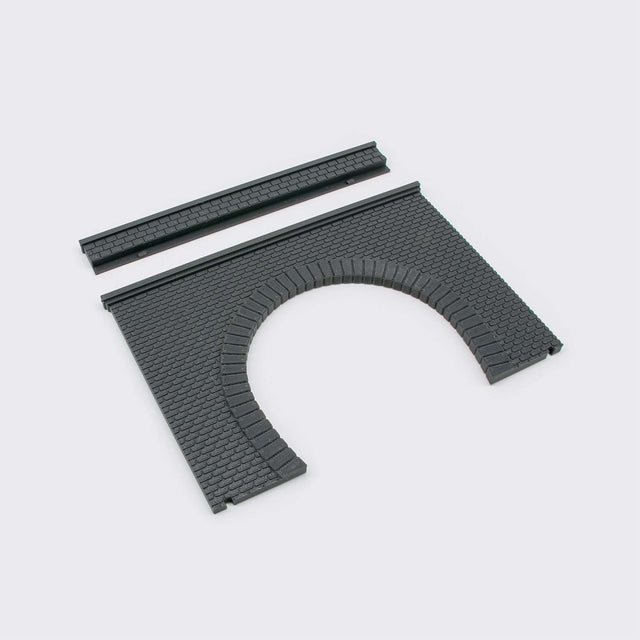
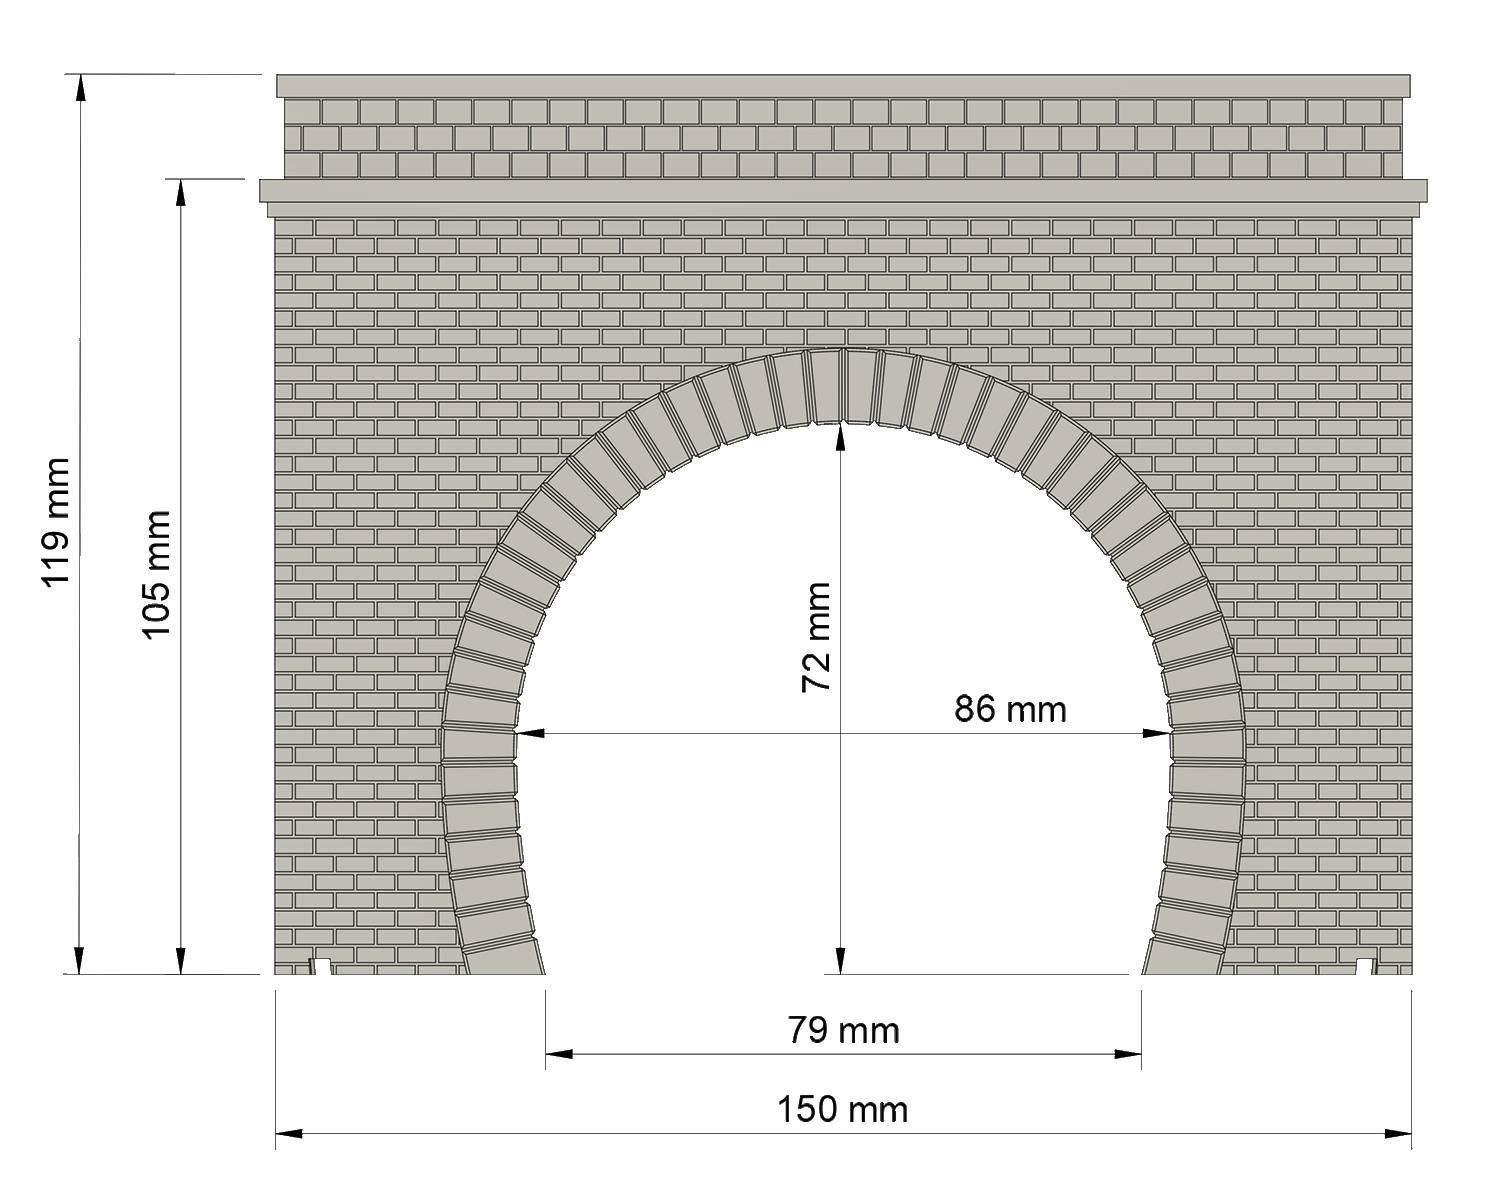
2-track portal for straight line - TT scale

€11,00
SKU: 1160.PRT.R0M
Select Finish

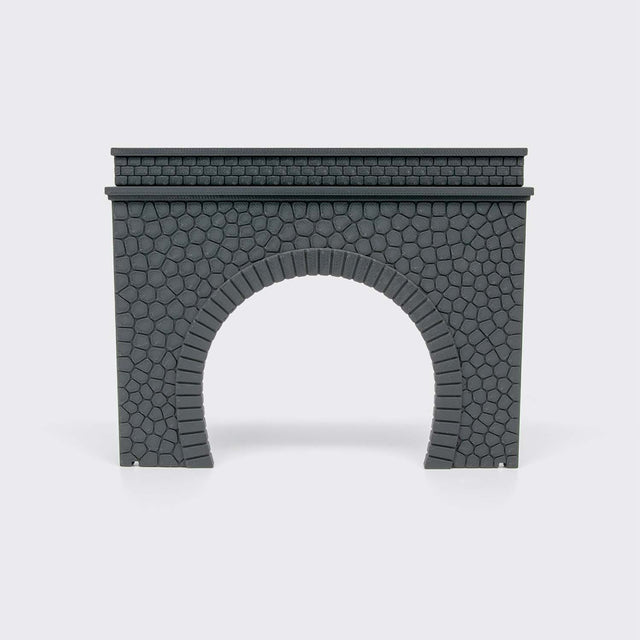
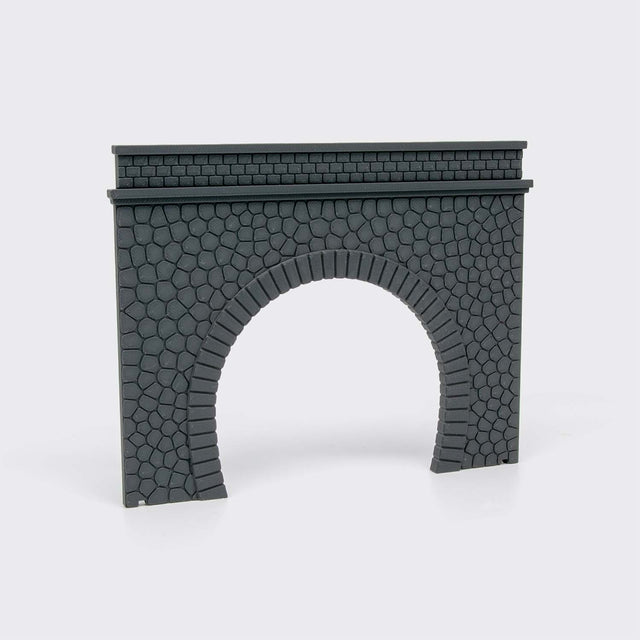
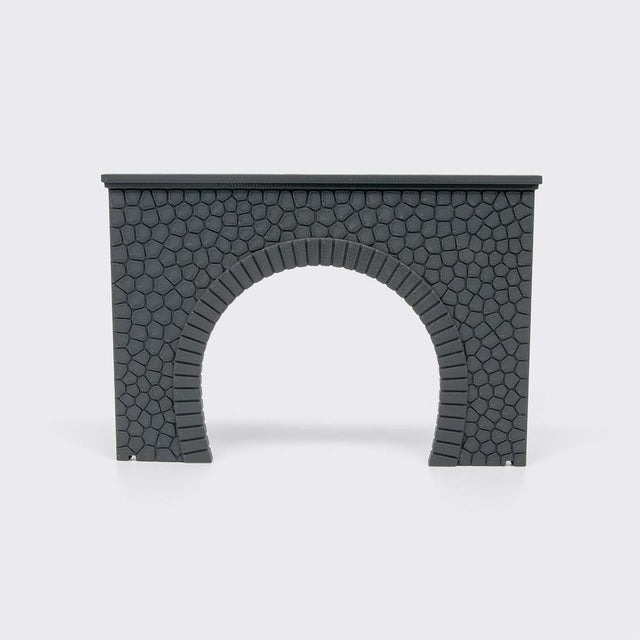
TT scale (1:120) reproduction of a tunnel portal for double-track railway lines with a standard track spacing of 43 mm. Suitable for straight lines thanks to the reduced tunnel entrance width for greater realism, similar to the real thing. Suitable for both catenary and non-catenary lines.

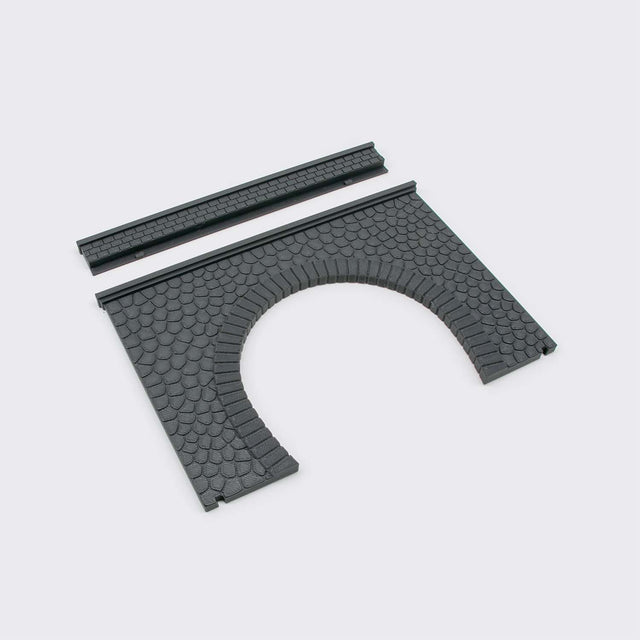
3D printed with FDM technology in dark grey eco-friendly PLA material, it is supplied unpainted.

Choice of brick or stone cladding.

The product is designed to be combined with the tunnel code 1160.TNL.R0 for straight lines with a standard 43 mm track spacing and with accessories such as stone columns for portals with code 1160.COL and with the lateral retaining walls code 1060.MM1 (brick wall) and code 1060.MP1 (stone wall).

Finishing of bioPLA portals

Assembly
The portal is supplied in a single piece, it does not require assembly. When assembling to other related items, use cyanoacrylate glue for a quick and resistant fixing.

Surface preparation
Remove any surface burrs and lightly sand with 180/240 grit sandpaper and possibly a second pass with a finer grit. With the piece clean and dry, it is recommended to use a spray putty to even out the surface and eliminate print streaks. Make several light, quick passes until you are satisfied with the uniformity of the surface. Be careful not to overdo it so as not to lose the details of the surface texture. Alternatively, you can also use liquid chalk or thick paint applied in several coats.

Painting
Subsequent painting can be done with opaque acrylic colours.
I recommend using at least two basic colors to bring out the three-dimensionality of the surface: one for the bricks/stones and the other to use between the interstices of the same.
There are two techniques that can be used:
1. Apply a first coat of uniform and covering color with the color you want to obtain in the raised parts (bricks or stones). When dry, apply the second very diluted color (the one you want to obtain between the gaps) and dab with a sponge or absorbent paper only on the raised surface to remove excess colour. Give more passes until you are satisfied.
2. Apply a first coat of diluted color (whatever you want to obtain between the gaps).
When dry, apply the second color by dabbing very lightly on the raised surface with a sponge. Give more passes until you are satisfied.
Subsequently, other colors can be given with the dry brush technique or with spotting powders to give the product a more lived-in and less uniform appearance.

0 / 0
Go to top Top